Wednesday, July 25, 2012
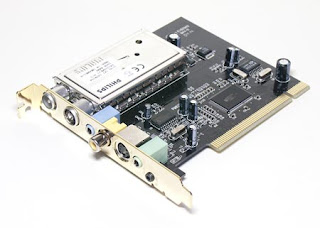
TerraTec Cinergy 600 TV manual
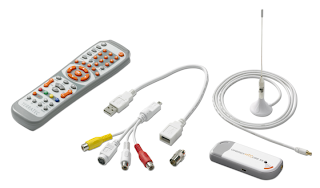
RC input (TerraTec Cinergy 400 TV/Cinergy 600 TV radio only)The sensor for the remote control of Cinergy connects here. The remote control gives you not only complete control TV functions, but also allows you to control Windows programs with the touch of a button. For further information about remote control and software, see the documentation for (auto starter, documentation, remote control). TerraTec Cinergy 600 TV manual get here
TerraTec Cinergy 400 TV manual
RC input (TerraTec Cinergy 400 TV/Cinergy 600 TV radio only) The sensor for the remote control of Cinergy connects here. The remote control gives you not only complete control TV functions, but also allows you to control Windows programs with the touch of a button. For further information about remote control and software, see the documentation for (auto starter, documentation, remote control).
Driver installation under Windows 2000 The installation will be described for a TerraTec Cinergy 400 TV. The installation for Ciner-gy models 200 TV and Cinergy 600 TV is identical, however. Owners of 200 and 600 models should reflect the appropriate numbers in the following images.get manual here
TerraTec Cinergy 400 manual USB
Installing the driver in Windows XP The next time you start your computer, Windows XP will recognize the USB Cinergy 400 and will start the hardware installation Wizard. Then, select "install the software auto-mati [Recommended]" and click "next".Windows XP will automatically find the correct driver installation CD. the end of the installation by clicking "Finish".
get manual here
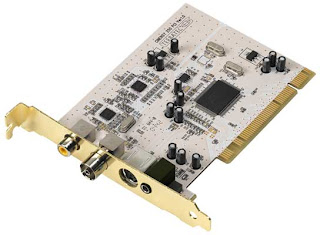
TerraTec Cinergy 250 PCI Handbook
Important settings for the audio card owners If you have connected the audio output of the Tv card at the entrance to the line of your sound card using the cable supplied easy-easy, you'll have to do some settings in the mixer for your sound card, so you can hear and record the tone of Tv/video. To do this, proceed as follows:
Double-click the icon for leveling depicted as a speaker on the taskbar to make sure that the "Mute" option below the slider "Line-In" is not checked and that is not the slider "Line-In" at the bottom of the range. get here
TerraTec Cinergy 1400 DVB-T manual
Installation of drivers WHQL Certified. A few comments in advance, before we get into the details. To make the installation of Cinergy as pleasant an experience as possible, will avoid any problem or bureaucratic obstacles and had Windows drivers certified by Lab material qualifications Microsoft Windows (WHQL). This means that if you do not have a current copy of Cinergy Windows CD, will download the drivers from a Microsoft server via the Internet, and that the drivers will be incorporated in future versions of Windows, as far as possible. However, we recommend that you follow the instructions below.
The reason for this recommendation is that the operating system considers the Cinergy as many individual devices. The installation — including the download, uncompress, security controls, etc. — Therefore, it will take an excessively long time.
Installing the driver in Windows XP
As already noted above, the operating system sees the various elements of the Cinergy as individual devices. This means repeating the following installation steps until Windows stops recognizing new devices. This may seem a little uncomfortable, but it is necessary to ensure that the driver installation is complete and correct
The actual purpose of virtual Dub, except write operations described below, is to convert one video format to another. In the process, you can change the resolution, correct colors, choose a compressor can reduce the size of the file, or simply to remove unwanted portions of the source file.
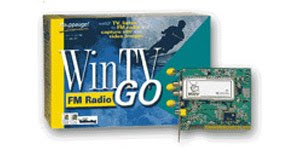
Hauppauge WinTV-GO-FM Handbook
Connecting VCR WinTV Board, camera or camcorder Most cameras have a VCR'or female RCA Jack, labeled "Video Out". Most also have a slot labeled "Audio Out". Most cameras have just one output link, labeled "Video Out". To connect the video on WinTV Board, use shielded video cable (not supplied) with male RCA connectors on both ends: Connect from the "Video Out" Jack on your video camera, video camera or VCR HAS composite video input socket on the Board WinTV.
get Hauppauge WinTV-GO-FM Handbook here
Hauppauge WinTV-PCI manual dbx functions
After installing WinTV Board, you can see which interrupt and memory area assigned by Windows Plug and play, looking at the configuration in Control Panel. Plug-and-Play will not allow you to change the interrupt assigned to it, but you can, if necessary, change the memory address chosen by Windows. Note:some models have a WinTV RCA Jack yellow for the bracket back panel. Others have a Jack input S-Video high quality. that requires a supplied S-Video composite video adapter to connect to your camcorder.
With always on top, the WinTV can always be visible to the Windows desktop. To enable always-on-Top, simply click always-on-top button. It will be green. To disable always on top, click this button again. Hauppauge WinTV-PCI manual dbx functions get here
TerraTec Cinergy 1200 DVB-S manual
Hotline and Internet In the event of a serious problem — where neither able to resolve the problem yourself, nor with the guided help found in this manual, nor with the help of your supplier — please contact us directly. TerraTec Cinergy 1200 DVB-S manual get here
Hauppauge WinTV-GO Installation and Reference Manual
The program volume is normally installed with Windows Setup or sound card and allows the control of volume from different sources. If you cannot hear sound when running the application WinTV, you may need to check the intensity input Line in volume control.
get here
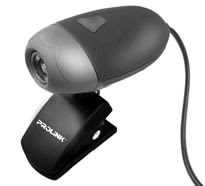
PROLiNK PCC5020 user manual
CAPTURE PICTURE
1. Click Start all programs > > favorite your application for editing images
2. in the application window, click the picture of the capture/snap-to capture image
3. to view your photos, double-click the files with images that are saved in the folder of the default media
RECORD VIDEO
Click Start all programs > > your favorite video editing applicationIn the application window, click capture/record button Start/Stop recordingTo view video, double-click video files that are saved in the default folder format
get manual here
VCAM Envision Manual guide
Select the driver/application CD into the CD-ROM. start screen will appear. Alternatively, open the drive directly and double-click the autorun file to load the start screen. From the initial screen, click install DRIVER, then select V-Cam. Note: If an unidentified program wants access to your computer dialog box appears, click Enable.
Note: If you want to use a V-Cam with chat programs on the Internet such as Yahoo! ®, Windows LiveTM Messenger or MSN ® Messenger or SkypeTM, close the application to play video AMCap by choosing file? Exit. Follow the instructions on your application of chat for enabling Web camera functions. get envision v cam driver download here
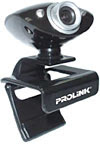
PROLiNK PCC1300 Manual
Insert the CD with the installer. First install the driver, and then follow the instructions on the screen. after the driver is installed, you are prompted to restart the PCWait until the reboot your computer before you connect the camera cable to the USB port: insert the cable to the camera to the computer USB port. Complete installation of software and hardware for Windows 2000 users: Please install the DirectX ProgramRestart from your computer if promptedPlug audio connector 3.5 mm jack in "Mic in" the sound of your computer/device. click "VP-eye" link to install embedded applications
Implementation of software Click Start on the Windows taskbar, and then select the programs and go to the newly created program group to the implementation of the software
get manual here
PROLiNK PCC1320 User Guide
Download now
PROLiNK PCC1310 Service manual
Ligthing. Shoot pictures and videos with bright light sources behind the camera and outside the area of the picture. Photo. You can take a snapshot of the currently displayed image by simply clicking once on the button module
get manual here
PROLiNK PCC810 Web camera manual
Place the camera in the middle of your monitor for optimal contact with the eyes camera can be placed on a tabletop or in your hand to snap a picture or video. rotate the focus ring to get live video sharp imageView to be your focus adjustments
Record video Click Start programs > > your favorite video editing applicationIn the application window, click capture/record button Start/Stop recordingTo view video, double-click video files stored in the default folder format
Support for products and contact information In PROLiNK we are committed to provide you with the best products and the best technical support for your product. If there is a virus on your system, we can provide suggestions as where you can find the decision to remove the virus, but we could not help, while the virus is destroyed get manual here
PROLiNK PCC900 Guide
Insert a CD. install the driver, and then follow the on-screen instructions during the installation of the driver, you are prompted to bconnect, the camera cable to the USB port: Insert camera cable in my computer USB portComplete software installationRestart your computer When prompted (optional for PCC900): click the "VP-eye" link to install embedded applications Implementation of software Click the Start button in the Windows taskbar, and then select the programs and go to the newly created program group to the implementation of the software.
Position of the camera Place the camera in the middle of your monitor for optimal contact with the eyes camera can be placed on a tabletop or in your hand to snap a picture or video. rotate the focus ring to get live video sharp imageView to be your focus adjustments get manual here
The Aroma of Citrus Juicer ACJ,-181 user guide
Read all instructions and important safeguards.Remove all packaging and make sure that the items are being received in good condition. Tear and get rid of all the plastic bags as they represent a risk for children.Wash accessories in warm soapy water. Rinse and dry.Wipe clean with damp cloth body. Do not use Abrasive cleaners or scouring pads.Do not immerse the citrus juicer plug or cord, base in water or other liquids in any time.
This device has a polarized plug (one blade is wider than the other); perform the following steps: reduce the risk of electric shock, this plug is intended to adapt into a polarized outlet only one way. The plug is not fully plugged in, reverse the plug. If it still does not fit, contact a qualified electrician. Do not attempt to modify the plug in any way.Short power cord is provided to reduce the risk resulting from becoming entangled in or tripping over a longer cord.Longer extension cables are available and can be used if it is taken.If you use a long extension cord: evaluation of electrical extension cords marked should be at least as large as in the evaluation of electrical appliances.Longer cord should be arranged so that it will not drape over the counter top or the Board, where the children may be requested or inadvertently tripped. get here
Kalorik BL-1 hand mixer
Always unplug from the wall outlet before cleaning.For a quick rinse of pour jar (for example, between two products), you can use clean water and turn on your appliance for a few seconds. In this case, do not use any detergent.The complete cleaning of the jar, you can pour a glass in the dishwasher, directly to the bottom. My dishwasher is absolutely safe, if you use only washing temperature lower than 60 ° C/140 ° f. in the event that there is no washing temperature, please use "normal" cycle or less.Collar/base of the Blade Assembly jar would never spread from glass parts, as it may result in a permanent leakageThe may be deleted on the engine block of the net with a soft damp cloth.
IMPORTANT INFORMATION This appliance is not for professional use. Should follow the breaks. Failure to carefully monitor this instruction may result in damage to the engine. Maximum continuous use time is 3 minutes. After 3 minutes of continuous use, you should insert a break for at least 10 minutes. get here
Blender Kalorik Aztec BL-8
The position of the "P" (impulse) is special, because the button must be kept manually. This position is generally used to crush ice, to damage to the blades, but can also be used to finish mixing. The Blender is running at high speed as you push the button. This button is intended only for the powerful ignition system, rather than continue its use. May damage your device uses the "pulse" button continuously.
Smoothie function The "smoothie" keeps on running, blender at high speed. After pressing the button "smoothie" Blender stops working again, and all three of the direction-indicator lamp will Flash. get here
Kalorik BL-3 hand mixer
Short power cord is provided to reduce the risk resulting from becoming entangled in or tripping over a longer cord. Extension cables may be used, if it is taken in their use.Evaluation of electrical extension cord should be at least of this device. If it is too low evaluation of electric cable extension, could be overheating and burn.The resulting extended cable should be arranged so that it will not drape over the counter top or the Board, where they can be requested by children or tripped over.
HOW TO CLEAN UP Always unplug from the wall outlet before cleaning.For a quick rinse of pour jar (for example, between two products), you can use clean water and turn on your appliance for a few seconds. In this case, do not use any detergent.Complete cleaning, remove the jar from the motor block and turn the blade fixing rings on the bottom of the glass counter-clockwise to disconnect the closing ring and blade (it does, the easier the cleaning). Then you can clean these parts of the soapy water and rinse thoroughly with water. Dry before assembling. Connect the blades, closing the ring around the blades, it is on the bottom of the glass insert and tighten the fastening rings by rotating to the right (to tighten the increase release). Warning, not to lose the seal during this operation.You can clean the engine block with a soft damp cloth. get here
Kalorik Blender BL-7
Some of the instruments are equipped with a polarized plug (one blade is wider than the other). To reduce the risk of electric shock, this plug will fit in a polarized outlet only one way. If the cable does not fit properly into the wall outlet first, turn around. If it still does not fit, contact a competent qualified electrician. Do not attempt to modify the plug in any way.
IMPORTANT INFORMATION This appliance is not for professional use. Should follow the breaks. Failure to carefully monitor this instruction may result in damage to the engine. Maximum continuous use time is 3 minutes. After 3 minutes of continuous use, you should insert a break for at least 10 minutes. get here
The Aroma of the ABD-530 G Blender user manual
Both paws on the inner edge of the sealing ring Blade Assembly Blade with clamping ring ... to the base of the Cup.Mount the base unit Cup jar from fucking her in a clockwise direction.Mount a glass jar and base of the Blender Cup base by pressing down until safely engaged and rotating in a clockwise direction, lock. Make sure that the engine is turned off before the installation of the glass container.After putting the ingredients in the jar lid on glass priklop, press and hold.Insert the cover lid lid open access and that the direction counterclockwise until it is locked.
Quarter onion and place in a blender Add the broth, and pepper in a blender. Pulse until coarsely chopped onions are. Pour the mixture into the pot and bring to boil. Reduce heat and simmer about 20 minutes or until the onions are soft and clear. Pour the soup into bowls and top with a slice of French bread, then sprinkle over the top thick rinds. Place under broiler until cheese is melted and bubbly. Serve immediately. get here
Kalorik Blender BL-25161L
Complete cleaning, remove the jar from the motor block and turn the blade fixing rings on the bottom of the glass counter-clockwise to disconnect the closing ring and blade (it does, the easier the cleaning). Then you can clean these parts of the soapy water and rinse thoroughly with water.Dry before assembling. Connect the blades, closing the ring around the blades, it is on the bottom of the glass insert and tighten the fastening rings by rotating to the right (to tighten the increase release). Warning, not to lose the seal during this operation
Warning : silicate jar your blender is designed to support the sudden temperature variations of up to 50 ° C/125 ° F after preparing the ice training., it is important that cleaning the glass with very hot water immediately after separation, or may break the glass. Similarly, after preparing hot soup as a preparation, please rinse is not very cold water immediately after separation
get here
AVANTI WDE98PS package User Manual
press the power button the power unit on the unit is in stand-by, and will show the time of the upper-left corner of the window display. To switch OFF the power, just press the power button again.Display clock Press SETUP button to adjust the hours. After pressing, the time will Flash. With the help of HOT (+) or COLD (-) buttons you can set the display time "AM/PM. Press, the SET button again to set the minutes. With the help of HOT (+) or COLD (-) buttons, you can adjust the "minutes" display. Wait for the display to stop blinking (approximately 10 seconds).
DISPLAY OF TEMPERATURE HOT feature. Click the HOT once to turn hot. Press the SETUP button (3 times) the yellow numbers appears on the left side of the display panel. With the help of HOT (+) or buttons for COLD (-) you can adjust the temperature to the desired setting. Wait for the display to stop blinking (approximately 10 seconds). get manual here
AVANTI WD31EC water dispensers instructions
We are proud with our Organization for customer service and the network of professional service technicians who provide services of your AVANTI a appliances. Purchase your AVANTI a instrument you can be sure that if ever you additional information or assistance, team AVANTI a customer service products will be here for you.
Cycle of cold water are not affected by a program and run continuously to maintain cold water at a temperature between 7 ° C/44 ° F and 10 ° C/50 ° F. After the "cold" lights in the rear of the unit is turned on (blue) "cold" cycle, the indicator will be on until the temperature of the water in the storage reservoir drops to 7? /44 ° F or less, will shut down these indicator (blue) "cold" cycle and cooling cycle will stop until the temperature reaches 10? /50 ° F, at which time (blue) "cold" cycle indicator will turn on again and again will start cooling cycle.
When the button of the program press the down end, under the programme for energy savings; Will be displayed (green) E-S indicator. During the operation will display indicator (red) "WARM" cycle, while the temperature of the water in the tank reaches 60 ° C/140 ° F. get manual here
AVANTI WDP69 User Manual
Before you connect the appliance to the power source, let it be placed upright approximately 2 hours. This will reduce the possibility of a failure in the cooling system of treatment during transportYour water dispenser has been cleaned and disinfected before leaving the factory, but in the case of the problem of taste develop, place two tablespoons of Baking soda and add tap water. Fill the tank again and basic operations, previously outlined, with the exception of the inclusion of the switch market hot "off" to avoid the occurrence of residues in the hot water tank. get manual here
AVANTI WD31 User Manual
Use a clean cloth to wipe the neck of the bottle. Remove CAP, if any. Insert bottle water receives above the tank opening so it finds on it correctly. Wipe all water, which may be poured on top of the aerosol dispenser content.Turn the key, marked "cold" on the green indicator (cold) will be inaugurated and begin the process. When water reaches the appropriate temperature goes green (cold) indicator automatically.Turn the key, marked "hot" n. red indicator for (ACTIVE) will be lit on and unit will begin to heat the water. When water reaches the appropriate temperature goes red light (ACTIVE) automatically. When the temperature goes up to approximately 86 ° C (187 ° F), the red indicator will glow again and another.
Check to make sure the COLD switch on the back is on too much water is fixed within a short period of time. If more than two 8 oz glasses., have been defined in the trim of 25 minutes, you will need to wait about an hour to reach optimum temperature. get manual here
AVANTI WD30EC User Manual
Plug the appliance into an exclusive ground properly installed firewall network. Under no circumstances does not Cut or remove third (ground) prong CD has to offer from the power cord. Questions about power and/or grounding should be directed to certified electrician or authorized products of AVANTI a service center.The water cooler is purchased-cleaned by the factory, but the tank and water lines must flush the column as follows with fresh water before use:
Keep the unit unplugged. Tank for water be filled with running water, full of capacity (about 20 ounces). Wait for 5 minutes, until the water. continue to drain the water from the two faucets, until no more water remains. then drain any water remaining in the tanks by opening the water leave the caps located on the bottom, while fully placed. Continue to close the lids of brains. Also, make sure that both faucets are closed. Insert bottle water of water intake, allow water to stand for about one minute. Open water faucets to insure water flows from both faucets package. plug into an electrical outlet. get manual hereAVANTI WDP75 package User Manual
Your water dispenser has been cleaned and disinfected before leaving the factory, but in the case of the problem of taste develop, place two tablespoons of Baking soda and add tap water. Fill the tank again and basic operations, previously outlined, with the exception of turn "OFF" to avoid the occurrence of residues in hot water tank of hot water.If you do not plan to use the water, heating function of more than three days, we recommend that you turn on the hot water.
This appliance must be earthed correctly for your safety. The power cord of this appliance is equipped with three-prong plug which mates with a standard three prong CD has to offer firewall markets to minimize the possibility of electric shock.Plug the appliance into an exclusive ground properly installed firewall network. Under no circumstances does not Cut or remove third (ground) prong CD has to offer from the power cord. Questions about power or grounding should be directed towards a certified electrician or authorized products of AVANTI a service center. get manual here
AVANTI WD361 package User Manual
Control of hot water Turn on the heat the key, red indicator will be inaugurated on and start the process of heating. When water reaches the appropriate temperature goes to red light automatically. When the temperature goes up to approximately 80 ° C (176 ° F), the red indicator will glow again and another heating process begins. get manual here
AVANTI WD29EC package User Manual
Plug the appliance into an exclusive ground properly installed firewall network. Under no circumstances does not Cut or remove third (ground) prong CD has to offer from the power cord. Questions about power and/or grounding should be directed to certified electrician or authorized products of AVANTI a service center.This appliance must be earthed correctly for your safety. The power cord of this appliance is equipped with three-prong plug which mates with a standard three prong CD has to offer firewall markets to minimize the possibility of electric shock.Turn the power switch on. Yellow (cool)-will be inaugurated and begin the process. When water reaches the appropriate temperature yellow (cool) beam was released and included green (cold) light.
We are proud with our Organization for customer service and the network of professional service technicians who provide services of your AVANTI a appliances. Purchase your AVANTI a instrument you can be sure that if ever you additional information or assistance, team AVANTI a customer service products will be here for you. Simply call us toll-free get manual here
AVANTI a WDR32 water meter instructions
Plug the appliance into an exclusive ground properly installed firewall network. Under no circumstances does not Cut or remove third (ground) prong CD has to offer from the power cord. Questions about power and/or grounding should be directed to certified electrician or authorized products of AVANTI a service center.Use a clean cloth to wipe the neck of the bottle. Remove CAP, if any. Insert bottle water receives above the tank opening so it finds on it correctly. Wipe all water, which may be poured on top of the aerosol dispenser content. get manual here
AVANTI WDT51 User Manual
Check whether the following parts are included: instruction manualAccessories line fromBefore connecting the appliance to the power source, let it be placed upright approximately 2 hours. This will reduce the possibility of a failure in the cooling system of treatment during transport. water dispenser with fresh water before use, as follows:
keep the unit unpluggedFill water tank with water tab fully for capacity (almost 3/4 gallon). wait for 5 minutes unit water appliances.
Press stop valve for hot water, until the water, then Turn package. into an electrical outlet. All three indicator lights at the front will light up the most forward. we are ready to complete the first cycle to do this, wait for the light to be the first hot water (approximately 10 minutes), then wait for a light cold water to (yet 5 minutes approximately).
Cup dispenser (optional)
Cup dispenser can be installed by using the mounting holes (covered with plastic caps) located in the upper part of the right side panel cooler. Cup dispenser is equipped with a mounting screw and among can be ordered by completing the enclosed order of with your instructions. get manual here
Sanyo EM-S5595S microwave oven owner's Manual
Remove all packaging and accessories. Examine the furnace for any damages such as dents or damaged door. Do not install the oven is damaged. Do not remove the light brown MICA cover inside the oven CAVITY that is attached to the protection of the reactionary.
You can enter five cooking programs to save in memory. Each program can have a maximum of 2 cooking stages, as some provisions require different cooking stages at different power levels to get better results. Each stage can be programmed with different time and power level. download here
Sanyo EM-Z2100GS microwave oven owner's Manual
To prevent burns, use a thick oven when you remove the crocheted food, grill rack or stove with oven.Not heat baby bottles or baby food in microwave ovens. Uneven heating can occur and can cause injury.Pull handle to open the door gently.When you open the door during the cooking process, cooking and baking, bus stops, but the program will not canceled. Touch START to resume cooking.
Warning: do not install the furnace on top of the Cook's range or other devices heat production. If you have near or above the heat source, could be destroyed in the oven and warranty would be void. download here
User Guide Samsung SMH7178STD Microwave
The pause/Cancel button lets you clear instructions that was entered. Also allows to pause the oven by boiling cycle, so that you can see the food.To pause the oven during cooking: press pause/Cancel once. To restart, press the Start button to stop cooking, erase instructions and return to the oven display hours: press pause/Cancel twice to clear instructions were only.: press pause/Cancel once and then enter again the instructions.To cancel the timer setting: press the pause/Cancel once.
For best cooking results leave the Turntable. Can be disabled for large dishes. Press the Turntable to Turntable turn on or off. Sometimes the Turntable can become too hot to touch. Be careful touching the Turntable during and after cooking. download here
Maytag CWE4800ACE built-in oven owner's Guide
The timer can be set from 1 minute up to 9 hours, 50 minutes. Will count the seconds (in the case of settings for 1 minute) or minutes (in case the settings for 2 minutes or longer). Below are instructions on how to set the timer.Locate and mark the circuit breakers or absorbent. Never replace the blown fuse reset circuit breakers, as long as you do not know ao, causing the soles to blow or a circuit split. Always replace blown fuse one correct voltage, does not use a substitute.
Never block oven vent. Blocked vent prevents air flow oven properly and will affect the performance of the oven. Avoid touching the oven vent area, while the oven is on and for a few minutes after you turn off the oven. Some parts of the crater and the surrounding are heat up enough to cause burns. download here
Sanyo EM-S8500S microwave oven owner's Manual
Electrical requirements are 120 v 60 Hz, AC only, and 15. It is recommended to arrive to separate circuits that support only the oven. The oven is equipped with a 3-prong grounding plug. Must be connected to the receiver walls, which is properly installed and grounded.Short power supply is provided to reduce the risk of tripping over Indochina entanglement in or longer cord.The longer cord sets or extension cords are available and may be used if care is exercised in their use.If you use a wire or a 2-wire extension cord:
selected cord set or extension cord electrical rating should be at least as great as the electrical rating of the device.A 2-wire extension cord must be the cord, 3-wire grounding type and a longer cord should be arranged so that it will not drape over the countertop or the top table where you can download by children, or accidentally tripping over.
Should be any disruption caused by microwave ovens with microwave ovens, check whether the TV is on a different circuit, or radio or TV Broadcasting relocated as far away as possible from the oven or check the location and signal reception antenna download here
Samsung SMH7177STE microwave oven user manual
Thaw frozen foods, microwave ovens and food Set weight automatically sets defrosting time, power level and fixed period of time. Function Power defrost will automatically activate when defrosting food, which weigh less than 1,0 kg.The Auto defrost feature will automatically activate when defrosting food, which weigh more than 1,0 kg. Note that the Auto defrost feature (defrosts the food, which weigh more than 1,0 kg) may take a few minutes longer than the defrost function (function defrosts the food, which weigh less than 1,0 kg). download here
Sanyo EM-S9515W microwave oven owner's Manual
Do not install the furnace on top of the Cook's range or other devices heat production. If you have near or above the heat source, could be destroyed in the oven and warranty would be void.This basic Microwave cooking method allows you to Cook food over a suitable period of time. The oven can be programmed by 99 minutes 99 seconds. Beyond the level of 100% (PH 1) you can select different Microwave power with 10 levels.
Because the Microwave cooking requires only one-fourth to one-third of conventional cooking time, cooking and baking principles become even more important.Cut food into uniform shapes and sizes for even cooking in the microwave. During cooking the irregular shapes (such as chicken pieces), place the thicker parts of the outer edge of the dish. download here
Maytag CWE5800ACE oven owner's manual built-in
Be careful when you open the oven door. Let hot air or steam escape before removing or replacing the food. Move the oven rack to add or remove the food using dry, examination of the holders of the pool. Always avoid reaching into the oven to place, remove the food.Never block oven vent. Blocked vent prevents air flow oven properly and will affect the performance of the oven. Avoid touching the oven vent area, while the oven is on and for a few minutes after you turn off the oven. Some part of the ventilation and the surroundings heat up enough to cause burns.
If the store has been delivered, should be limited to items which are rarely used and which are securely stored on the area subjected to the heat of the appliance. The temperature in the storage unit above may not be safe for certain items, such as volatile liquids, cleaners or aerosol dispensers. download here
Sanyo EM-S5002W microwave oven owner's Manual
Liquids, such as water, coffee or tea can be overheated beyond boiling point without boiling. See bubbling or boiling when the container is removed from the microwave oven is not always present. This could result in very hot liquids, sudden boiling over when the container is disrupted or a bucket or other przybór is inserted into the liquid.Guards only. Small pieces of smooth can be used to cover the thin part of the meat or poultry to prevent overcooking. Arcing can occur if the foil is too close to the oven wall. The foil should be at least 1 inch (2.5 cm) from the walls of the oven.
Do not install the furnace on top of the Cook's range or other devices heat production. If you have near or above the heat source, could be destroyed in the oven and warranty would be void. download here
Sanyo EM-U1000B microwave oven owner's Manual
Do not overcook the food. Carefully take the device when the paper, plastic or other flammable materials are placed inside the oven to facilitate cooking. Do not use the oven CAVITY to their storage. Do not store combustible items such as bread, cookies, paper products, etc inside the oven. If lightning strikes the line power, oven can enable yourself.
Remove all packaging and accessories. Examine the furnace for any damages such as dents or damaged door. Do not install the oven is damaged. Do not remove the light brown MICA cover inside the oven CAVITY that is attached to the protection of the reactionary.Press the button to open the door.When you open the door during the cooking process, cooking and baking, bus stops, but the program will not canceled. Touch START to resume cooking. download here
Euro-Pro 9105 Sewing Machine Manual
This appliance has a polarized plug (one blade wider than the other), to reduce the risk of electrical shock; this plug will fit in a polarized outlet only one way. If the plug does not fit fully in the outlet, reverse the plug. If it still does not fit, contact a qualified electrician. Do not modify the plug in any way
The computer will automatically adjust the needle upper position when the machine is switch on, and automatically adjust the needle lower position when you start sewing. Please note that it is a normal phenomenon if you hear a sound coming from the machine (machine adjusting sound) and feel that the sewing is being delayed. It’s not dangerous to sew. get manual here
Euro-Pro 8660 Sewing Machine Manual
To test the bobbin thread tension, remove the bobbin case and bobbin from the machine and hold the bobbin case suspended by the thread. Shake it once or twice. If the tension is correct, the thread will unwind by about an inch or two. If the tension is too tight, it will not unwind. If the tension is too loose, the thread will unwind for more than two inches.Reserve sewing is used for locking the and of seams and where reinforcement is needed. At the and of seam, press down the reverse sewing lever and touch the foot control lightly.
The maximum zigzag stitch width for zigzag stitching is “5?; however, the width can be reduced on any pattern. The width increases as you move zigzag dial from “0?-”5?. get manual here
Euro-Pro 7500XH Sewing Machine User’s Manual
To test the bobbin thread tension, remove the bobbin case and bobbin from the machine and hold the bobbin case suspended by the thread. Shake it once or twice. If the suspended by the thread. Shake it once or twice. If the tension is correct, the thread will unwind by about an inch or two. If the tension is too tight, it will not unwind. If the tension is too loose, the thread will unwind for more than two inches.
Reverse sewing is used for locking the end of seams and where reinforcement is needed. At the end of seam, press down the reserve sewing lever and touch the foot control lightly. Sew a few reverse stitches. Release lever and the machine will sew forwards again.Remove the zigzag foot and attach the buttonhole foot. Adjust the stitch length dial between “0.5?-”1?. The density of the stitch depends on thickness of the fabric. get manual here
Euro-Pro Dressmaker 998B Sewing Machine User’s Manual
Make sure that the power switch is in the ‘OFF’ position. Insert the batteries with the polarities in the correct position as indicated on the machine or connect the AC/DC adapter plug into the AC/DC receptacle on the right side of the machine. Connect the foot control into the foot control receptacle.
Raise the needle to its highest position.Hold the needle and loosen the needle clamp screw. Then remove the old needle.Insert the new needle into the clamp with the flat side facing away from you, toward the rear of the machine. The eye of the needle should be facing the front of the machine. Push the needle up into the needle clamp as far as it will go.Tighten the needle clamp screw. get manual here
Euro-Pro 1100 Dressmaker II Sewing Machine User’s Manual
Very heavy fabric or too many layers of fabric will force the sewing machine to stop. Thread is tangled in the lower bobbin. Stop the machine. Cut the tangled threads to clear it from the machine. Re-thread both the bobbin and the needle.Poor quality stitching: refer to “Adjust Thread Tension”. When new batteries are installed, the sewing machine should work for approximately 2 hours under normal sewing conditions. Remember that heavy fabric requires more power, so it will reduce the running time of the batteries.
Hold the end of the upper thread with the left hand, and turn the hand wheel slowly anti-clockwise until the needle goes down and up again to its highest position. Pull the upper thread slowly and the lower threads to the back and place them together under the presser foot. get manual here
